|
|
TRIUMPH MARLIN |
|
A brief history of my Kitcar from its first beginnings to the present day.
It all started in 1977
when I worked with a trainee architect who enthused about a
Mini-Marcos he used to own. The tales of the fun he had and the sheer
enjoyment in driving something different to the norm inspired me to
investigate further. I purchased a Kitcar magazine and sent for
information on half a dozen different kits that took my fancy.
When
they arrived it just confirmed my initial thoughts that the MARLIN
looked the best kit, coupled with the fact that it was TRIUMPH
HERALD based and I already drove and maintained a Herald confirmed the
decision to order a kit.
I ordered my kit in 1978
knowing there was an 11 month waiting list at the time. This gave me
time to find and prepare a donor vehicle. Eventually I found a scrap
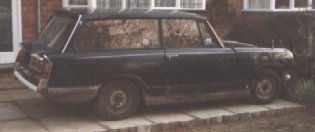
dealer who had a TRIUMPH HERALD 13/60 ESTATE for £50.
For a little extra he delivered it to my home. I was ready to
start.
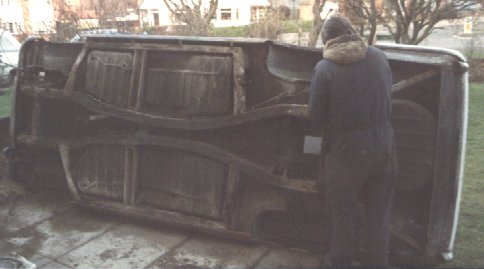
I started by stripping the car of all its fittings and
trim, I didn't know at the time what I would need to keep, so the
estate body came in useful for storage. This cleared the access to
all the mechanics which were the main parts required from the donor
car.
|
This is the original car featured in the kit car brochure's that attracted me to the Marlin. It was the designer, Paul Moorhouse's every day transport, the latest in a series of specials the Rolls Royce engineer built for himself. |
The other side of the original Marlin, outside the factory on the day I turned up to collect my kit in the van behind, as can be seen the car looks great from all angles which is why he was pursuaded to put his design into production, and very gratefull all Marlin owners are for that decision. |
|
|
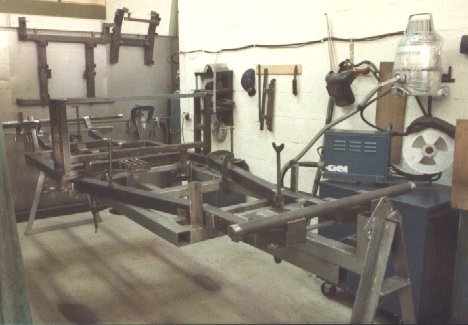
This is another chassis being welded up on the jig in the welding bay at the factory it would be for the next-but-one kit after mine and shows the care being taken to ensure all stock suspension and drive components fit first time. |
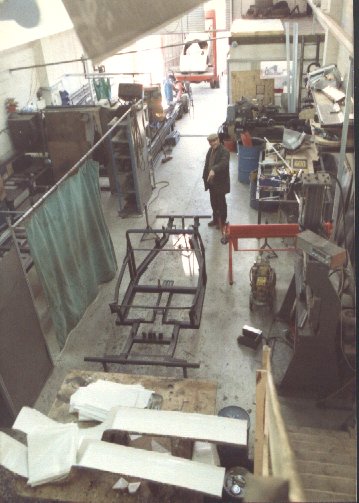
A view of the factory unit showing a made up chassis ready for the body panels in the centre (the next kit after mine) the welding bay is on the left with the lathe behind it for modifying the propshaft and steering column and one of Pauls earlier specials in front of the the van at the far end with my kit loaded into it and you can see the rear wing moulds in the foreground with more moulds (not shown) beneath the steps where the photo was taken from. |
|
|
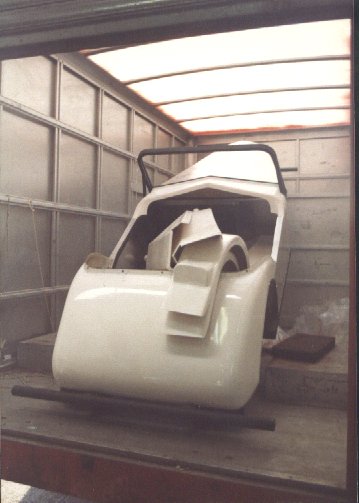
My kit all loaded into the back of a luton bodied transit van ready for the trip back home, it fitted in quite nicely with the front up over the cab and wasnt heavy so was relatively easy to lift into place, modifying the propshaft, pedals and steering cloumn is included in the price of the kit |
The donor car - a scrap Triumph Herald 13/60 Estate |
|
|
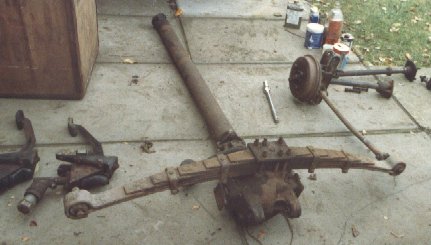
The easy way to get the running gear and suspension off the rotten chassis members of the donor car - I'm using a big hammer and cold chisel as the rust makes the use of sockets and spanners redundant as the chassis members crumble |
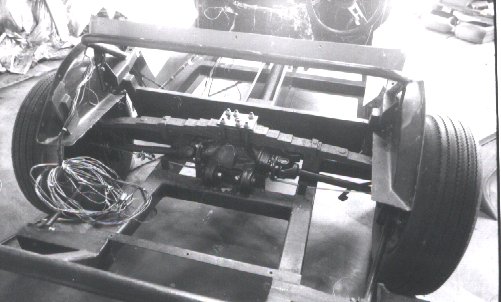
Propshaft, Differential, Halfshafts, Rear Spring, Pedal boxes etc all stripped off ready for refurbishment, the propshaft is cleaned up and taken along for modifying when collecting the kit. |
|
|
|
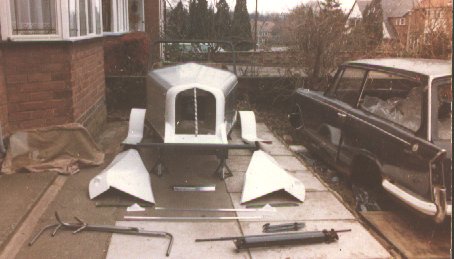
The donor car sitting part stripped next to my unpacked kit, this also shows the propshaft, pedal and steering column modifications that were included in the kit as well as the hood frame and the DIY radiator grill - crimped wires that have to be woven together. |
|
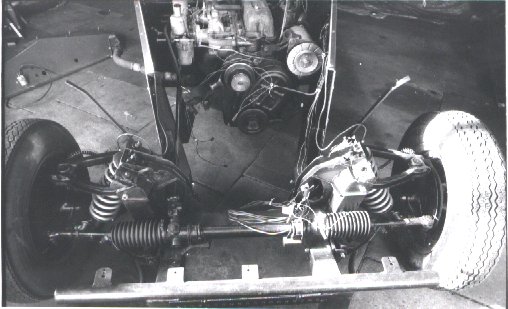
The front suspension complete and supporting the front end of the car, shown with radiator cowling and bonnet removed revealing the modified heater box fitted to the bulkhead |
|

|
The cowling and bonnet fitted back on also showing the tonneau cover that I fitted early on for weather protection as I was still building it out in the open at that time |
I finally got my own place which included a garage and brought the Marlin over to work on under cover. The car was first completely built up in its bare state to ensure that all required holes are drilled etc before it is sprayed |
|
|
|
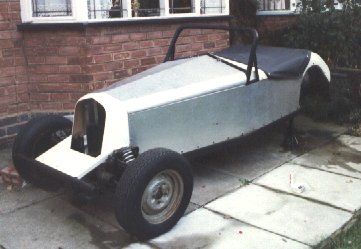
Rear running gear now complete, radiator grille made up, wings fixed, side screens and hood fitted - getting there now to start dismantling it again |
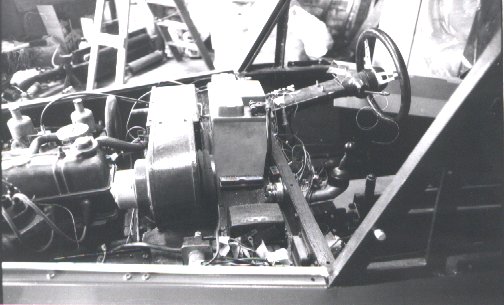
Wiring the kit - Front of the car I stripped the original Triumph loom down to the individual cables and with some bodywork removed |
|
|
Wiring the Kit - Bulkhead I then followed the original Triumph wiring colour codes to connect the electrics up so the original wiring diagram could still be used |
Wiring the kit - Rear of the car I ran the cables to their correct positions following the new body shape and trimmed them to correct length |
|
|
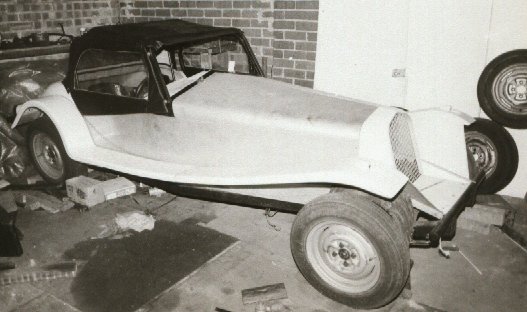
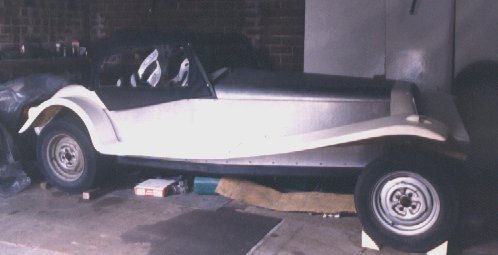
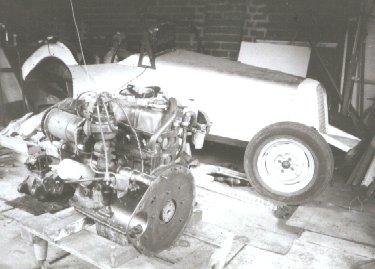
Engine out and all non bodywork parts being stripped off ready to prepare the body shell for spraying |
|
|
|
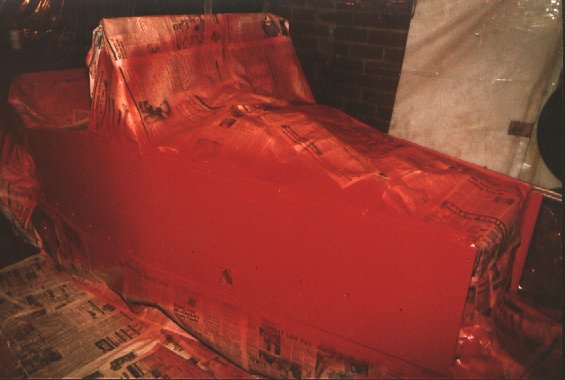
Spraying the bodywork, etch primer, under coat and top coat- you might have guessed what colour it would be - RED of course |
|
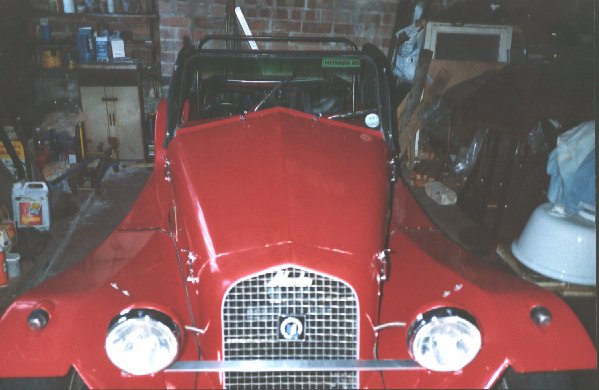
View from the front of the newly completed car showing the sweeping lines of the wings and long bonnet |
|
|
|
First time out proudly displayed at the local Marlin Owners Club meeting |
|
Posing for photographs for a feature in the works magazine, word soon got out and I was requested to do a small write up about my "home built car" |
|
|
|
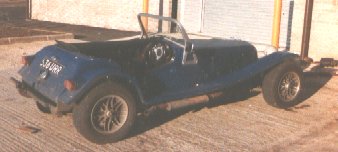
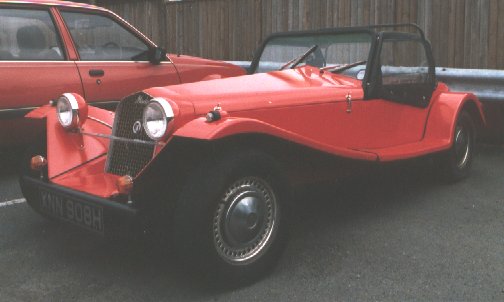
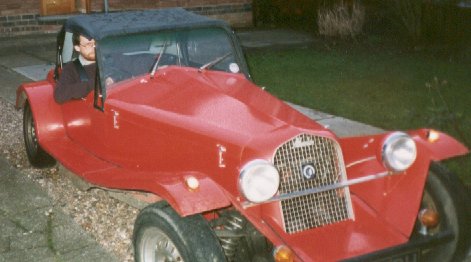
The completed car was used as my every day form of transport for a number of years summer and winter, the metal number plate made a good snow plough |
|
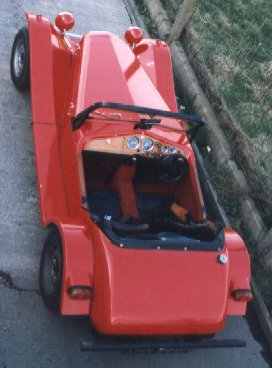
Ariel shot of the completed car - just look at those lines, that design is just so right |
|
|
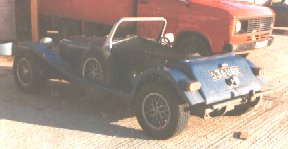
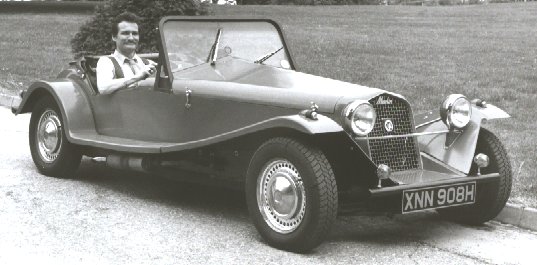
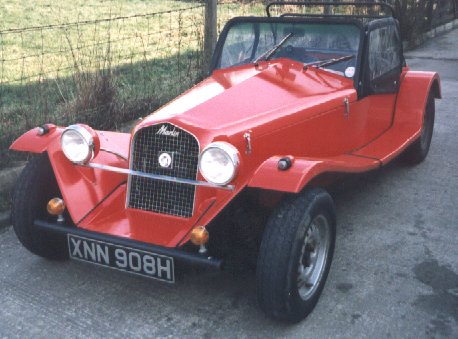
The car in general use was a joy to use and I gradually modified it over the years replacing the wheels and making minor adjustments to ventilation but it didn't need much as it was just right from the start |
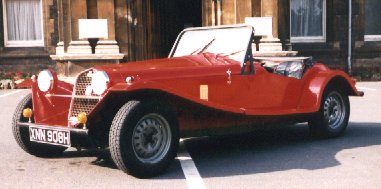
The car in its natural setting, outside a stately home ready for all the admiring glances |
|
 |  |  |
 SITE MAP SITE MAP |
e-mail: webmaster(at)jonger(dot)co(dot)uk
